
Your home’s outdoor systems work hard all year, quietly protecting your investment through freezing winters, rainy springs, scorching summers, and blustery falls. Yet most homeowners only think about these systems when something breaks, which often means paying more for emergency repairs instead of routine maintenance. A simple season-by-season approach can help you catch small issues before they become expensive problems. This checklist walks you through exactly what to inspect, service, and plan for throughout the year.
Spring Roof and Gutter Inspection Priorities
Winter is tough on roofs, so spring is the ideal time to check for damage caused by ice, snow weight, and freezing temperatures. Walk the perimeter of your home and look up for missing shingles, sagging areas, or granules collecting in your gutters, which can signal wear. If you notice soft spots, curling shingles, or daylight coming through your attic boards, it may be time to call one of the established roofing companies in your area for a professional evaluation.
Gutters deserve equal attention since clogged or damaged gutters can lead to water intrusion and foundation issues. Clear out leaves, twigs, and debris that accumulated over the winter months, and check that downspouts are directing water at least three feet away from your foundation.
- Inspect flashing around chimneys, vents, and skylights for cracks or gaps
- Look for moss or algae growth, which can trap moisture against shingles
- Check attic insulation and ventilation for signs of moisture damage
- Confirm gutters are securely fastened and free of sagging sections
Spring Startup for Cooling and Sprinkler System Equipment

As temperatures climb, your air conditioning system needs to transition from months of inactivity to daily use, and a quick startup check prevents mid-summer surprises. Replace air filters, clear debris from around the outdoor condenser unit, and test the system before the first真正 hot day arrives. If you hear unusual noises or notice weak airflow, scheduling AC repair early in the season is far easier than waiting until technicians are booked solid during a heat wave.
Spring is also when your irrigation system should be reactivated after winter dormancy. Check sprinkler heads for cracks caused by freezing temperatures, and run a full test cycle to confirm even water coverage across your lawn and garden beds. Adjusting your irrigation schedule now, before summer heat sets in, helps establish healthy root growth and prevents water waste from leaks or misaligned heads.
- Replace or clean HVAC filters before heavy summer use begins
- Test thermostat settings and programmable schedules
- Walk your yard to check for pooling water or dry patches from irrigation issues
- Inspect exposed pipes and backflow preventers for winter damage
Summer Deck, Patio, and Fence Maintenance
Outdoor living spaces take a beating during summer months with increased foot traffic, sun exposure, and weather extremes. Inspect your deck boards for splintering, warping, or loose fasteners, and reseal the surface if water no longer beads on contact. Homeowners planning a larger outdoor upgrade often reach out to custom deck builders during summer, since this is when they can best visualize how a new structure would function for entertaining and daily use.
Fencing also requires a seasonal look, especially after storms or heavy rain. Check for leaning posts, loose boards, and rust on metal hardware, all of which can worsen if ignored. If repairs are extensive or your fence is approaching the end of its lifespan, consulting a fence company for an assessment can help you decide between patch repairs and a full replacement.
- Look for signs of wood rot near ground contact points
- Tighten loose screws, bolts, or hinges on gates
- Reapply stain or sealant to decks every two to three years
- Check fence lines for shifting caused by soil erosion
Summer Cooling System Efficiency Checks
Peak summer heat puts maximum strain on your cooling equipment, making this the season when inefficiencies become most noticeable. Rising energy bills, inconsistent temperatures between rooms, or a system that runs constantly without reaching the set temperature are all signs worth investigating. A unit cycling on and off more frequently than usual, or one that runs for hours without actually cooling the house, often points to a refrigerant leak, a failing capacitor, or a compressor working harder than it should. Many homeowners schedule a mid-summer tune-up with local HVAC services to confirm refrigerant levels, clean coils, and verify that ductwork isn’t leaking conditioned air into attics or crawl spaces. A technician will typically also check static pressure in the ducts, inspect the condensate drain line for clogs that can cause water damage, and test electrical connections that loosen over time from constant vibration.
Between professional visits, there’s plenty homeowners can monitor themselves. Replacing a dirty air filter every 60-90 days keeps airflow steady and prevents the system from overworking, while clearing leaves, grass clippings, and debris from around the outdoor condenser unit helps it dissipate heat efficiently. It’s also worth tracking your thermostat’s performance during the hottest part of the day, typically 2-6 p.m. If indoor temperatures consistently lag three or more degrees behind the setting during this window, that’s a strong signal your system needs attention before a minor issue turns into a costly midsummer breakdown.
Beyond comfort, an inefficient system during peak season can shorten the lifespan of expensive components like the compressor, sometimes by several years if the unit is forced to run under constant strain. A dirty or restricted outdoor condenser has to work harder to dissipate heat, which spikes energy bills and raises the risk of overheating on the hottest days. Keeping outdoor units clear of landscaping debris, mulch buildup, and overgrown shrubs allows for proper airflow and reduces strain on the whole system. Aim for at least two feet of clearance on all sides of the condenser unit, and trim back any plants or grass clippings that collect against the cabinet. While you’re there, check that the unit sits level on its pad and that nothing is blocking the top vents, since many models exhaust air upward.
It’s also worth rinsing the condenser coils with a garden hose every month or two to remove dust and pollen that accumulate even with good landscaping habits. Indoors, don’t overlook the air filter, which should be checked monthly and typically replaced every 60 to 90 days during heavy summer use. A clogged filter restricts airflow just as much as a blocked outdoor unit, forcing the system to run longer cycles to reach the same temperature. A few minutes of visual inspection each month during summer can catch problems while they’re still minor and inexpensive to fix, rather than waiting for a breakdown on the hottest day of the year.
- Monitor energy bills for unexplained spikes of 15% or more month-to-month, which often signal a struggling compressor or dirty coils
- Keep at least two feet of clearance around outdoor condenser units, trimming back shrubs, vines, and grass clippings that restrict airflow
- Listen for rattling, grinding, or clicking sounds during operation, which can indicate loose fan blades, worn bearings, or a failing motor
- Check and replace air filters every 1-3 months during peak summer use to maintain proper airflow and reduce strain on the system
- Inspect the condensate drain line for clogs or algae buildup, since a backed-up line can trigger water damage or automatic shutoffs
- Schedule professional maintenance before the hottest stretch of summer, ideally in early spring, to catch refrigerant leaks and recalibrate thermostats before demand peaks
Fall Driveway and Walkway Condition Review

Cooler fall weather is an excellent time to assess hard surfaces around your property before winter freezing makes small cracks much worse. Examine your driveway for potholes, alligator cracking, or drainage issues that allow water to pool and seep beneath the surface. Addressing these problems with asphalt paving repairs in autumn prevents the freeze-thaw cycle from turning minor cracks into major structural failures over winter.
Walkways and other paved areas deserve the same attention, particularly where tree roots or settling soil have caused uneven surfaces. Uneven pavement creates tripping hazards that become even more dangerous once ice forms later in the season. Sealing existing cracks now, while temperatures are still mild enough for sealant to cure properly, is one of the most cost-effective fall maintenance tasks homeowners can tackle.
- Check for standing water after rain, which signals poor drainage
- Fill small cracks before they expand during winter freezing
- Inspect curbing and edges for separation from the main surface
- Note any sections that may need full resurfacing in coming years
Fall Preparation for Home Heating Equipment
Before the first cold snap arrives, your heating system needs attention to ensure it runs safely and efficiently all winter. Replace filters, test thermostats, and listen for unusual sounds when the system first kicks on after months of inactivity. Many reputable heating companies recommend an annual fall inspection to check heat exchangers, clean burners, and verify that carbon monoxide detectors near the furnace are functioning correctly.
Beyond the equipment itself, fall is a good time to evaluate how well your home retains the heat it generates. Drafty windows, poor attic insulation, and gaps around doors all force your heating system to work harder than necessary. Sealing these leaks before winter not only improves comfort but also reduces the wear on equipment that would otherwise run longer cycles to compensate.
- Schedule a professional inspection before temperatures regularly drop below fifty degrees
- Test carbon monoxide and smoke detectors near heating equipment
- Check and seal gaps around windows, doors, and attic access points
- Keep vents and registers free of furniture or debris blocking airflow
Fall Lawn and Sprinkler System Shutdown
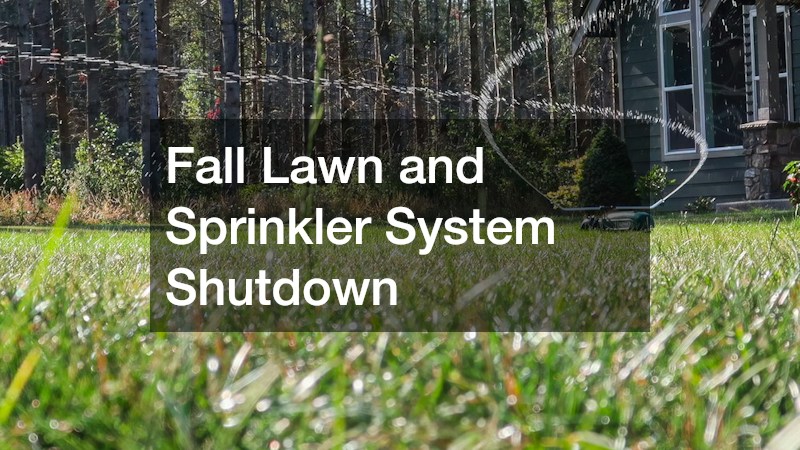
As the growing season winds down, your outdoor watering system needs proper winterization to avoid costly freeze damage. Shut off the water supply to sprinkler lines and schedule a professional blowout to clear remaining water from pipes and sprinkler heads. Skipping this step is one of the most common and preventable mistakes homeowners make, often resulting in cracked pipes that aren’t discovered until the system is turned back on in spring.
Fall is also the time to winterize outdoor fixtures beyond the sprinkler system, including hose bibs and exterior faucets. Disconnect and drain garden hoses, then install insulated covers over spigots to protect against freezing temperatures. Taking these extra steps in October or early November, depending on your climate, adds an inexpensive layer of protection against expensive plumbing repairs.
- Drain and store hoses before the first hard freeze
- Insulate exposed outdoor pipes and spigots
- Confirm the main sprinkler shutoff valve is fully closed
- Mark sprinkler head locations to avoid damage during winter landscaping work
Winter Exterior Siding and Structural Checks

Winter weather, with its combination of moisture, wind, and temperature swings, can expose weaknesses in your home’s exterior that weren’t visible during warmer months. Freeze-thaw cycles are especially damaging, since water that seeps into small cracks expands as it freezes, widening gaps and loosening panels over time. Walk around your property after major storms to check for cracked, warped, or missing siding panels, paying close attention to areas near the ground where splashback moisture accumulates and corners where wind-driven rain tends to collect.
While you’re outside, inspect caulking and flashing around windows, doors, and utility penetrations, since gaps as small as an eighth of an inch can let in enough cold air to spike your heating costs. Look for discoloration, soft spots, or a faint musty smell near the foundation, all of which can signal moisture working its way behind the siding. Check that gutters and downspouts are directing water at least three to four feet away from the house, since poor drainage is one of the most common causes of hidden rot. If you discover significant damage or notice your energy bills climbing due to poor insulation, consulting experienced siding contractors before spring can help you plan repairs or a full replacement while demand is typically lower. Many contractors offer off-season pricing between January and March, and booking early also means you’ll beat the spring rush when storm damage and home sales drive up demand. A professional assessment now can turn a minor repair into a quick fix rather than a costly structural problem down the road.
Beyond siding, winter is a good time to check your foundation and crawl space for signs of moisture intrusion or pest activity, since both tend to seek shelter in the colder months. Look for damp soil, white mineral deposits (efflorescence) on concrete, or a musty smell in the crawl space—all signs that water is getting in where it shouldn’t. Rodents and insects like termites also move toward warm, sheltered foundations when temperatures drop, so check for droppings, gnaw marks, or small entry gaps around utility lines and vents. Small cracks in the foundation can widen with repeated freezing and thawing, so documenting their size now helps you track whether they’re worsening.
A simple method is to measure crack width with a ruler or crack gauge and take a dated photo each month; anything wider than 1/8 inch, or showing active growth, should be flagged for a professional opinion. Pay extra attention to horizontal cracks or ones with visible displacement, since these are more likely to indicate structural movement than ordinary settling. Addressing these issues early prevents them from compounding into structural repairs down the road. Sealing minor cracks with an appropriate epoxy or polyurethane filler before spring thaw can keep meltwater from seeping in and expanding the damage further. If you notice sagging floors, sticking doors, or gaps around window frames, these can also be early indicators of foundation movement worth having a professional assess.
- Check for ice buildup against siding, especially ice dams along the roofline, which can trap moisture underneath and force it behind panels as it melts
- Look for gaps around utility penetrations (pipes, vents, cables) where pests seek warmth—a gap as small as a quarter-inch can let in mice
- Photograph existing cracks or warped panels monthly to monitor changes over the season, using a ruler in frame for scale
- Clear snow away from the foundation, keeping at least 6-12 inches clear to reduce moisture exposure and prevent freeze-thaw cracking
- Inspect caulking around windows and doors for shrinkage or peeling, since winter temperature swings accelerate sealant failure
- Watch for loose or missing siding panels after high winds, as even minor gaps can worsen rapidly under repeated freeze-thaw cycles
Final Thoughts
Staying ahead of your home’s outdoor systems doesn’t require a complete overhaul of your weekends, just a consistent habit of seasonal checks and timely repairs. By addressing small issues as they arise, you’ll avoid the stress and expense of emergency fixes and extend the life of every system protecting your home. Use this checklist as a recurring reminder each time the season changes, and don’t hesitate to bring in a qualified professional when a project is beyond your comfort level. A little proactive attention now pays off in comfort, safety, and savings throughout the year.
