
Taking ownership of an older fixer-upper is an undeniably romantic endeavor. The handcrafted millwork, distinct historic character, and solid framing timbers of past eras possess a timeless charm that modern cookie-cutter developments rarely match. However, the initial thrill of purchase often collides head-on with a daunting reality: decades of deferred maintenance, fragmented previous repairs, and outdated mechanical systems hiding behind original plaster walls. Without a clear plan of action, the excitement of revitalizing an aging house can rapidly degenerate into severe renovation fatigue and a depleted bank account.
The most common trap for buyers of historic properties is starting with high-visibility cosmetic projects. Ripping out kitchen cabinets, painting exterior trim, and refinishing original hardwood floors feel productive, but they are disastrous first moves if the roof leaks, the electrical lines are ungrounded, and the foundation sits in pooled runoff. Triage is the governing principle of historic property preservation. You must secure the structure, seal the building envelope, and overhaul life-support mechanicals before spending a single dollar on surface finishes.
Executing a successful whole-house renovation requires stepping back to view the property as an interconnected ecosystem. What happens below the basement slab dictates the health of your interior framing, just as exterior ground management dictates whether water penetrates your masonry foundation. The following comprehensive guide outlines a logical, battle-tested sequencing strategy to help you prioritize your upgrades, budget effectively, and transform a neglected fixer-upper into an enduring home.
Phase 1: Site Clearance and Critical Drainage Infrastructure

Before you swing a single demolition hammer or finalize interior architectural drawings, you must establish an unimpeded workspace and assess what is happening underground. Older properties accumulate decades of abandoned belongings, rotted outbuildings, collapsed plaster ceilings, and toxic refuse that pose genuine safety hazards to working crews and specialized trades.
Establish a Safe, Hazard-Free Baseline Work Environment
Attempting to run new utility conduits or inspect foundation perimeter walls through knee-high piles of scrap lumber, obsolete piping, and deteriorated fixtures is an invitation to injury and oversight. Older homes often conceal hazards such as friable lead paint chips, degrading mineral wool, or pest-fouled materials that must be sorted and cleared systematically.
- Clear ingress and egress corridors: Ensure all primary doorways, basement bulkheads, and exterior driveways are stripped down to bare passage, enabling tradespeople to transport heavy diagnostic gear without obstruction.
- Segregate hazardous from standard refuse: Identify salvageable historic hardware, original lumber, and copper pipes, while isolating chemical residues or contaminated drywall.
- Contract dedicated hauling logistics: Engaging a professional junk removal service early in the demolition phase prevents hazardous bottlenecking, frees up valuable on-site staging space, and ensures regulated disposal of heavy debris without cluttering public walkways.
- Inspect the bare structural frame: Stripping non-structural detritus allows you to examine wall plates, sill timbers, and load-bearing columns for hidden dry rot, subterranean termite tunnels, or past fire damage that would otherwise remain unnoticed.
Eliminate Hidden Subsurface Plumbing Bottlenecks
Once the site is stripped clear of physical debris, focus immediately on the home’s subterranean waste systems. Old properties frequently rely on century-old cast iron stacks, brittle clay drainage pipes, or galvanized waste arms that have suffered from calcification, shifting soil, or invasive tree roots.
- Run comprehensive sewer camera diagnostics: Never assume that a draining sink indicates a healthy waste line. Thread a fiber-optic camera through the primary cleanout out to the municipal connection to spot internal cracking or belly dips.
- Clear chronic pipe blockages: Booking an extensive drain cleaning service with high-pressure hydro-jetting strips decades of grease build-up, mineral scale, and root intrusions from interior pipe walls, restoring proper flow rates.
- Locate deteriorated underground connections: Camera runs often expose offset joints or collapsed pipe collars beneath basement slabs that must be excavated and replaced before pouring new floor levels.
- Verify venting configurations: Ensure original plumbing stacks properly exhaust sewer gases through the roofline without siphoning fixture traps dry, which frequently causes stubborn odors in vintage homes.
Phase 2: Sealing the Exterior Thermal and Weather Envelope
Once underground waste lines are verified and interior workspaces are bare, focus your attention on the building envelope. Water intrusion is the single fastest destroyer of timber framing, masonry mortar, and interior plaster. Every dollar spent on interior finishes will be completely wasted if external moisture continues to penetrate your walls and window frames.
Fortify Structural Cladding and Eliminate Moisture Intrusion
Neglected exteriors often conceal severe rot behind cracked clapboards, failing asbestos tiles, or worn masonry surfaces. Addressing exterior cladding is not merely about aesthetic curb appeal; it is about establishing a continuous weather barrier that deflects wind-driven rain and prevents moisture migration into the stud bays.
- Strip degraded materials down to solid sheathing: Inspect what lies behind compromised wall panels to verify that historic board sheathing has not disintegrated from chronic leaks or insect infestation.
- Install modern continuous vapor and air barriers: Adding a breathable exterior house wrap creates a tight defense against external bulk water while allowing internal condensation to escape outward.
- Hire experienced envelope professionals: Partnering with an exterior siding company that understands historic building assemblies ensures new weather barriers, rainscreen gaps, and materials like fiber cement are integrated seamlessly without trapping interior moisture against old framing.
- Flash all critical transitions: Carefully seal vulnerable architectural junctions, such as roof-to-wall interfaces, window head caps, and corner boards, using durable metal flashing rather than temporary exterior caulk.
Stop Window Drafts and Historic Heat Loss Without Full Tear-Outs
Historic windows are often the soul of an older residence, featuring dense, old-growth wood that resists rot far better than modern softwood replacements. Tearing out original window boxes is rarely necessary and often ruins the architectural balance of the facade. Instead, you can dramatically upgrade your thermal performance through non-destructive additions.
- Restore sash cords and balance weights: Rehang original lower and upper sashes with modern synthetic cords or brass chains, ensuring smooth opening and closing operations.
- Repack degraded perimeter glazing putty: Strip dried, crumbling window glaze, bed individual glass panes in fresh elastomeric compound, and repaint the glazing line so it slightly overlaps the glass edge to prevent capillary water draw.
- Install high-performance protective exterior glass: Adding exterior storm windows provides a protective thermal boundary, doubling overall assembly insulation values, preventing condensation, and shielding delicate vintage wood sashes from harsh weathering.
- Eliminate perimeter draft infiltration: Apply spring bronze weatherstripping along sash channels and meeting rails to seal physical gaps against cold air currents while maintaining historic functionality.
Phase 3: Mechanical Overhauls and Climate Modernization

With a secured building envelope that keeps external weather out, it is time to address the internal mechanical systems. Vintage heating configurations, such as low-efficiency cast iron gravity boilers, open-flame floor furnaces, and undersized electrical panels, are inefficient, expensive to run, and present serious fire and carbon monoxide hazards.
Size and Balance Modern Heating and Cooling Configurations
Heating and cooling a drafty older home requires precise engineering rather than guesswork. Simply installing the biggest furnace available creates short-cycling issues, excessive humidity, and unnecessary wear on system compressors.
- Conduct a precise load calculation: Require a comprehensive Manual J calculation that considers the home’s ceiling height, uninsulated plaster walls, and window exposures before choosing heating equipment.
- Evaluate modern heat pump alternatives: Replacing bulky duct networks with zoned ductless mini-split systems or high-efficiency variable-capacity heat pumps delivers both heating and air conditioning without sacrificing ceiling height or ripping out antique crown moldings.
- Consult certified climate mechanics: Teaming up with a reputable HVAC company provides access to qualified technicians who know how to navigate tight attic chases, balance multi-level thermal stratification, and properly configure modern ductwork inside older architectures.
Protect Exterior Openings and Regulate Solar Heat Gain
Beyond mechanical heating and cooling, older homes historically relied on passive ventilation and solar control to keep interiors comfortable. Restoring or upgrading architectural window defenses reduces overall electrical loads and extends the operational life of your new climate systems.
- Re-establish operational functionality: Replace missing pintles, cast-iron slide bolts, and hold-backs so that protective exterior window coverings can swing shut securely ahead of violent storms.
- Select architecturally accurate, heavy-duty louvers: Choose durable wood, composite, or aluminum fabrications that offer adjustable louvers to deflect direct summer solar heat gain while letting breezes pass freely into the home.
- Rely on dedicated exterior fixture specialists: Collaborating with an established shutter company guarantees exact custom dimensions for non-standard, settlement-shifted vintage window frames, ensuring shutters close flush against window stops.
Phase 4: High-Traffic Interior Overhauls and Wet Areas
Once your building envelope is weather-tight and your mechanical, electrical, and plumbing rough-ins are inspected and approved, you can finally turn your focus inward. Start with high-traffic utilitarian zones, subfloors, and wet spaces where poor structural integrity or moisture leakage can quickly compromise your investment.
Level Unstable Subfloors and Modernize Ground-Level Footing
Decades of foundation shifting, past water leaks, and undersized joists leave many older homes with sagging, bouncy, or rotting floors. Before laying high-end tile or running hardwood, you must establish an unyielding, flat foundation surface.
- Reinforce deteriorating floor framing: Sister joists, add center beams, or jack sagging support posts in crawlspaces to relieve stresses on uneven upper floors.
- Manage basement slab moisture: Old uninsulated basement floors wick subsurface moisture upward via capillary action, causing wood underlayments to rot and paint to bubble off.
- Pour durable, moisture-resistant flooring: Installing diamond-polished concrete flooring in ground-level rooms, walkouts, or basement suites delivers a resilient, flood-proof surface that never rots, resists moisture vapor transmission, and looks sharp in modern interior conversions.
Overhaul High-Risk Wet Zones and Moisture Barriers
Bathrooms in older homes are notorious for hidden catastrophic rot. Decades of shower steam, failed lead pan liners, leaking cast-iron tubs, and poorly vented spaces often leave underlying joists and studs half-rotted.
- Rebuild wet walls from the studs outward: Strip away compromised plaster, rusted tile lath, and decayed backing lumber to expose sound structural timber.
- Install modern bonded waterproofing systems: Replace outdated paper vapor barriers with continuous uncoupling membranes, waterproof backer boards, and liquid waterproofing membranes around shower enclosures to ensure zero moisture escape.
- Hire qualified plumbing and wet-room builders: Engaging an experienced bath contractor ensures that heavy vintage iron baths, intricate marble mosaics, and modern pressurized valves are supported by properly reinforced joist spans and vented drain pipes.
Phase 5: Grading, Exterior Runoff, and Master Site Layout
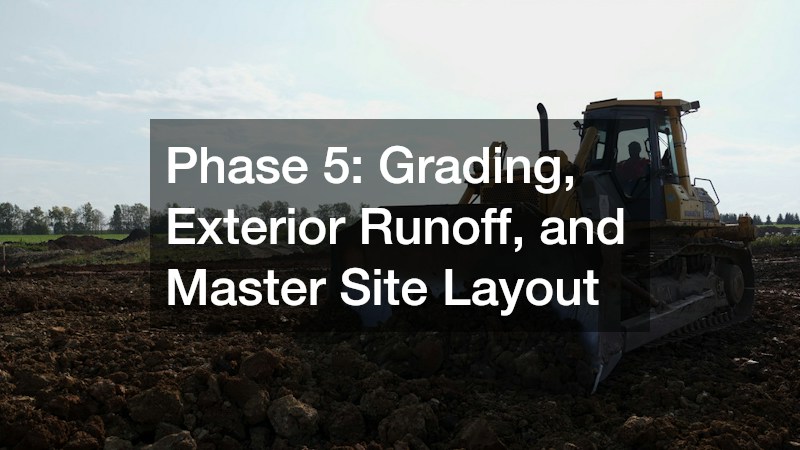
The final major phase of your comprehensive renovation addresses the surrounding landscape. How stormwater flows across your property directly impacts the structural health of your foundation. A dry, stable basement is achieved outside, not through indoor paint-on sealants.
Direct Surface Water Away from Ancient Foundations
Older rubble, fieldstone, or unreinforced brick foundations were never designed to hold back standing hydrostatic water. When roof runoff or landscape water pools near your exterior walls, water pressure forces its way through mortar joints, causing structural crumbling and interior basement flooding.
- Correct negative ground slope: Re-grade the soil surrounding the foundation perimeter to establish a minimum drop of six inches over the first ten feet away from the structure.
- Extend gutter downspouts underground: Direct downspouts into solid PVC drainage lines that exit well away from the house into pop-up emitters or dedicated dry wells.
- Construct functional drainage surfaces: Designing intentional hardscaping, including permeable paver paths, stone retaining walls, and graded patios, controls heavy rain runoff and channels water safely away from foundation walls.
Design an Ecosystem That Protects and Enhances the Home
A thoughtful exterior layout does more than look visually attractive; it actively stabilizes soil conditions, buffers the home against severe weather, and frames the restored historic architecture naturally.
- Map out root zone distances: Remove large, water-hungry trees whose extensive root systems threaten underground sewage lines, lift perimeter walkways, or siphon structural moisture away from vintage foundation footings.
- Optimize passive solar microclimates: Plant deciduous trees along south and west exposures to block hot afternoon sun in the summer while dropping leaves in the winter to allow warming light into the house.
- Engage site planning experts: Working with a professional landscape designer ensures that plant selections, soil grading, patio hardscapes, and native groundcovers are organized into a cohesive master plan that prevents soil erosion and enhances curb appeal.
Bringing the Vision to Life

Restoring a vintage fixer-upper is an exercise in strategic patience. When you look at an older home with peeling wallpaper, awkward layouts, and worn finishes, it is easy to let aesthetic desires drive your renovation budget. Yet, the homeowners who successfully navigate the renovation journey without financial ruin are those who respect the order of operations.
